How to screenshot on iPad: 7 easy steps for newcomers
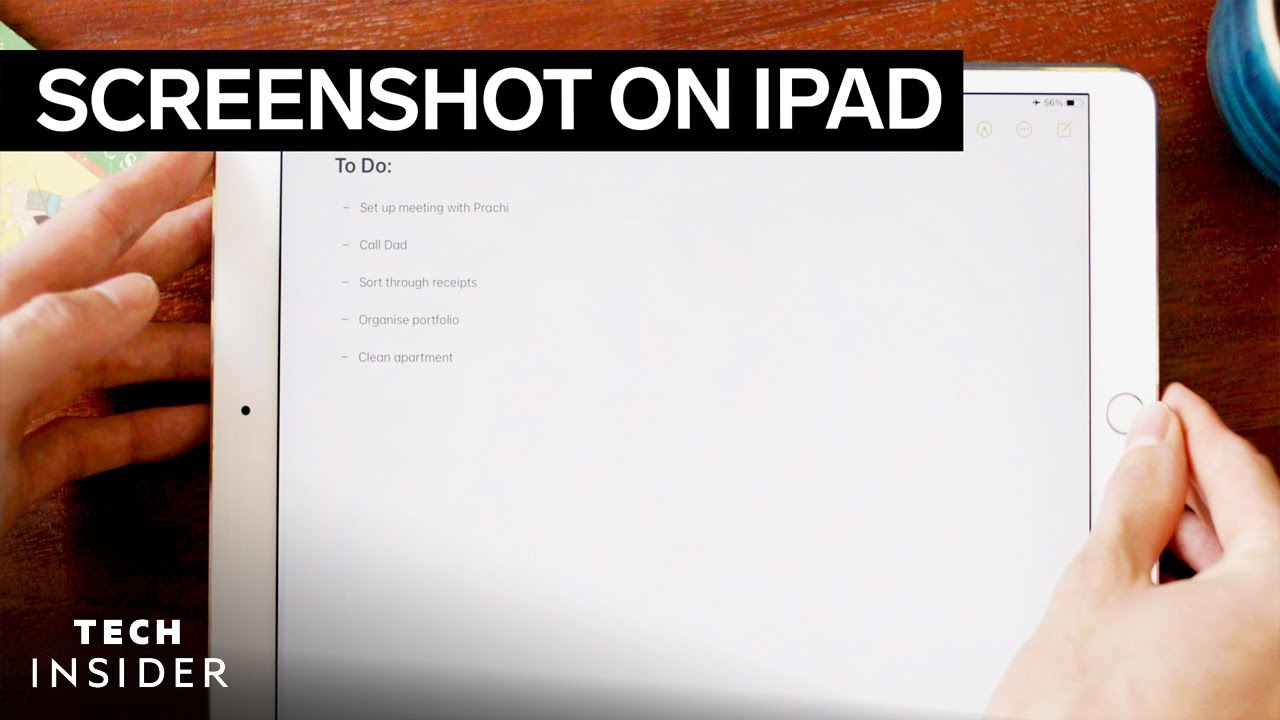
How to Screenshot on iPad
Have you ever found yourself needing to capture something important on your iPad? 📱 Whether it’s an article, an exciting game moment, or a quick note, knowing how to screenshot on iPad can be immensely useful. This article will walk you through various methods to take screenshots and tips to enhance your experience.
Methods to Take Screenshots on Your iPad
1. Traditional Button Combination
The simplest method to take a screenshot on an iPad involves using your device’s buttons. If you have an iPad with Face ID, press the Side Button and the Volume Up Button simultaneously. For iPads with a Home Button, press the Home Button and the Top Button at the same time. You’ll see a flash on the screen and hear a shutter sound, indicating that a screenshot has been taken.
2. Using AssistiveTouch
If pressing buttons is difficult, you can enable AssistiveTouch to take screenshots easily. To turn this on, go to Settings > Accessibility > Touch > AssistiveTouch. Once enabled, a floating button will appear on your screen. Tap it, then select Device > More > Screenshot. This method can be particularly helpful for users with limited mobility.
3. Using Apple Pencil
For iPad Pro users with Apple Pencil, another effective way to capture a screenshot is by simply tapping the screen with the Pencil. Ensure that you’re holding the Pencil above the screen and slide it down from the corner. This action will capture the screenshot instantly, allowing for quick access to your saved images.

4. Taking a Full-Page Screenshot
iPads also allow you to take full-page screenshots, which can capture entire documents or web pages. After taking a standard screenshot, tap on the thumbnail that appears, then choose the Full Page option at the top of the screen. This feature is especially useful when you want to save longer articles or documents as PDFs.
Editing and Sharing Your Screenshots
Once you’ve captured a screenshot, it’s time to edit and share it! After taking a screenshot, a thumbnail will appear in the bottom left corner of your iPad screen. Tapping on this thumbnail opens the editing tools, which allow you to:
- Add Annotations: Use various tools like pens, highlighters, and text to annotate your screenshot.
- Crop and Resize: Adjust the dimensions of your screenshot to focus on specific areas.
- Share Directly: Send your edited screenshot via messages, email, or social media straight from the editing screen.
Complementary Tools and Services to Enhance Your Screenshot Experience
While knowing how to screenshot on iPad is a key skill, integrating complementary tools can maximize your experience. Let’s explore some valuable tools that work well with your iPad screenshots:
1. Cloud Storage Solutions
Using services like Dropbox to save your screenshots can be beneficial. You get:
- Access Anywhere: Retrieve your screenshots from any device.
- Automatic Backup: Ensure your images are safe from accidental deletions.
- Collaboration: Easily share your screenshots with others.
2. Note-Taking Applications
Pairing your iPad’s screenshot feature with a note-taking app like Evernote can keep your projects organized:
- Organized Storage: Keep screenshots categorized with notes.
- Searchable Text: Quickly find screenshots via keyword searches.
- Sync Across Devices: Access notes and screenshots on all your devices.
- Collaboration Tools: Share notes with friends or colleagues seamlessly.
3. Image Editing Software
Utilizing image editing software such as Adobe Photoshop can enhance the visual impact of your screenshots:
- Advanced Editing: Apply filters, text, and graphics to create compelling visuals.
- Professional Quality: Elevate the quality of your screenshots for presentations or social media.
- Custom Banners: Use screenshots as part of marketing materials.
4. Social Media Management Tools
If you plan to share your screenshots on social media, platforms like Buffer can streamline your posting process:
- Schedule Posts: Plan your content calendar ahead of time.
- Analytics: Track engagement metrics to see how well your shared screenshots perform.
- Multiple Platforms: Post to various social networks simultaneously.
5. Collaboration Tools
Using collaboration tools such as Slack can enhance communication and feedback on your shared screenshots. With Slack, you can:
- Instant Messaging: Share screenshots with team members for quick feedback.
- Organized Channels: Keep discussions focused by creating channels for specific projects.
- File Sharing: Upload and share screenshots within conversations easily.
6. PDF Annotation Tools
To make your screenshots more interactive, consider using PDF annotation tools like PDFescape. This allows you to:
- Annotate Documents: Add comments, highlights, and drawings to your screenshots saved as PDF.
- Merge Files: Combine multiple screenshots into one PDF for presentations.
- Form Filling: Use your screenshots in forms that need input or signatures.
7. Cloud-Based Sharing Platforms
For seamless sharing of your screenshots, tools like Imgur offer simple upload options and extensive sharing capabilities:
- Quick Uploads: Share your screenshots with others in seconds.
- Community: Engage with a community that may find your content interesting.
- Embedding Options: Use screenshots in blogs by embedding directly from Imgur.
8. Workflow Automation Tools
Tools like IFTTT can help automate tasks related to your screenshots. Consider these benefits:
- Trigger Automation: Automatically upload screenshots to cloud storage at intervals.
- Share To Social Media: Post your screenshots automatically to your preferred platforms.
- Notifications: Set alerts for when screenshots are collected or modified.
- Integration: Connect various apps and services to streamline your workflow.
9. Creating GIFs and Videos
Consider using GIF creators like Giphy to transform your screenshots into engaging GIFs. This can be useful for creating tutorials or highlights from your screenshots. You’ll enjoy:
- Easy Uploads: Turn your screenshots into animated content quickly.
- Customization: Add captions or effects to enhance every screenshot.
- Shareability: Easily share GIFs on social networks.
10. Project Management Software
Apps like Trello make task management easier when combined with your screenshots. You can:
- Visual Boards: Add screenshots to project cards for better visualization of ideas.
- Assignment: Attach tasks or images directly related to individual projects.
- Progress Tracking: Monitor the developments visually as you work through projects.
Using Your iPad Screenshot Effectively
Understanding how to use your screenshots can amplify their benefits. By integrated tools and apps effectively, you enhance how to screenshot on iPad, ensuring that it supports your daily tasks and projects.
Endless Possibilities with Your iPad Screenshots
The methods and tools mentioned above highlight how versatile and powerful how to screenshot on iPad can be. So, the next time you snap a screenshot, think about how you can use it creatively and strategically with the tools at your disposal! 🛠️
Methods to Capture a Screenshot on iPad
Taking a screenshot on an iPad is a fundamental skill that enhances how you can share information, ideas, or simply moments from your screen. Whether you’re a student sharing class notes or a professional capturing data for a project, mastering this can greatly streamline communication. 📱 Let’s dive into the methods to capture a screenshot on iPad effectively.
Using the Physical Buttons
One of the simplest ways to take a screenshot on an iPad is by using the physical buttons. Here’s how:
- For iPads with Face ID: Quickly press the Side button and the Volume Up button simultaneously.
- For iPads with a Home button: Press the Home button and the Top button at the same time.
- Release both buttons quickly, and you’ll see a flash on the screen, indicating the screenshot has been captured.
This method is widely regarded for its speed and simplicity compared to alternatives. You can easily capture any screen with minimal effort.
Screenshot Using AssistiveTouch
If you prefer a more accessible approach, enabling AssistiveTouch offers an alternative way to take screenshots. Here’s how:
- Go to Settings > Accessibility > Touch.
- Select AssistiveTouch and toggle it on.
- Tap the floating AssistiveTouch button, select Device, then More, and tap Screenshot.
This method is particularly advantageous for users with mobility impairments, allowing easy access to essential functions for screenshots.
Using Siri to Take a Screenshot
Another innovative method involves using Siri. Simply activate Siri by saying “Hey Siri” or pressing the Side button, then command, “Take a screenshot.” This hands-free option is not only convenient but enhances multitasking capabilities.
Accessing Your Screenshots
After capturing a screenshot, where do they go? The screenshots are automatically saved to the Photos app. You can find them in the Albums section under Screenshots. 🎉
From here, you can view, edit, or share your screenshots seamlessly.
Edit Your Screenshots Quickly
iPad screenshots come with built-in editing options. 🚀 Once you take a screenshot, a thumbnail appears in the bottom-left corner of the screen. Tapping it opens editing tools such as:
- Pencil Tool: Draw or annotate your screenshots directly.
- Text Tool: Add notes or highlights.
- Eraser: Remove any markings if needed.
- Crop Tool: Adjust the size and focus of the screenshot.
These features enhance the usability of your screenshots, allowing you to add context and make your information clearer for sharing!
Complementary Methods to Enhance Your Screenshot Experience
Enhancing how to screenshot on iPad can be achieved through various complementary tools and apps. Let’s explore some effective combinations that further improve your workflow and experience. 🤝
1. Cloud Storage Solutions
Using tools like Dropbox can significantly enhance how you manage and share screenshots. By storing your screenshots in the cloud, you can access them anywhere. Advantages include:
- Effortless sharing across multiple devices.
- Free up space on your iPad by saving images in the cloud.
- Easy organization through folders.
- Automatic backup of important screenshots.
2. Image Editing Software
Enhancing your screenshots can be done using applications like Adobe Photoshop. Here’s why pairing it with your screenshot capabilities is a great option:
- Advanced editing tools for professional-quality images.
- Layering options for more complex designs.
- In-depth color correction tools.
- High-resolution exports for different platforms.
3. Instant Messaging Apps
Using messaging apps like Slack allows for quick sharing of those screenshots with your team or friends. Benefits include:
- Instant feedback and collaboration on shared visuals.
- Ability to create specific channels for related screenshots.
- Direct integration with file uploads for organization.
- Mobile notifications for immediate responses.
4. Note-Taking Applications
Using apps like Evernote can greatly enhance how you organize and annotate screenshots. Consider these aspects:
- Efficient organization of your notes and images.
- Ability to tag and categorize different screenshots for easy retrieval.
- Built-in editing options for quick annotations.
- Sync across devices for access anywhere.
5. Screen Recording Tools
Using tools such as OBS Studio can complement how to screenshot on iPad by allowing screen capture in video form. This pairing is beneficial for creating tutorials or presentations. Key advantages include:
- Ability to record your screen and provide voiceovers.
- Step-by-step guides can be more effective visually.
- Record complex tasks that may be difficult to screenshot.
- Easy sharing of video files for remote teamwork.
6. Annotation Apps for Enhanced Clarity
Another great companion is Drawing Pad. This tool offers robust marking features for your screenshots. Who can benefit from it?
- Professionals needing to highlight key information.
- Students summarizing their lecture notes visually.
- Creators wishing to add artistic elements to their captures.
- Anyone looking to improve visual communication through annotations.
7. Online Sharing Platforms
Websites like Imgur make it easy to host and share your screenshots. This method ensures quick and hassle-free sharing through links. Benefits include:
- Immediate uploads without creating an account.
- Ability to anonymize the shared images if preferred.
- Community engagement through comments and reactions.
- Accessible link sharing for a wider audience.
8. Project Management Tools
Utilizing tools such as Trello can streamline your workflow by attaching your screenshots to project cards. This helps in tracking projects visually. Why choose this method?
- Associating images directly with tasks helps provide context.
- Collaboration on projects becomes more visual and dynamic.
- Ability to prioritize tasks based on visual references.
- Improves communication by bridging gaps through visuals.
9. Social Media Sharing
Integrate your screenshots into platforms like Instagram. This pairing is essential for showcasing creative work or important updates. Advantages include:
- Wider audience reach for engagements.
- Interactive posts can facilitate discussions around your content.
- Visual storytelling enhanced with immediate feedback from followers.
- Easier sharing of promotional materials or hints.
10. File Management Systems
Using a file management app like Files.com can ensure your screenshots are always organized and accessible. Key features include:
- Structured storage for all tech-related screenshots.
- Advanced searching capabilities to find the right files quickly.
- Automatic backups to avoid data loss.
- Collaboration tools for team projects and collective discussions.
Tips on Optimizing Your Screenshots
To maximize the benefits of how to screenshot on iPad, keep these tips in mind:
- Regularly organize your screenshots in folders within the Photos app.
- Consider adding text or annotations to provide context.
- Utilize cloud storage for easy access from different devices.
- Experiment with editing features to enhance the clarity of valuable information.
By employing these strategies, you’ll be able to not only capture but also leverage screenshots effectively, enhancing your digital communication.
Conclusion
Mastering how to screenshot on iPad is not just a technological skill; it’s a gateway to improved communication and productivity. From immediate sharing to utilizing complementary tools, the advantages are clearly substantial. By refining your approach to screenshots, you can ensure that your content stands out, is clearly understood, and is efficiently shared, enriching every interaction you have in your digital life.
How to Screenshot on iPad: A Comprehensive Guide 📱
Have you ever found something on your iPad that you wanted to save or share? **Taking a screenshot** is one of the simplest ways to do so! In this guide, we will explore various methods on how to screenshot on iPad and provide tips on using it effectively.
Understanding the Basics of Taking Screenshots
Before we dive into the methods, let’s clarify what a screenshot is. A screenshot is a digital image of what is displayed on your device’s screen. It can be useful for saving important information, sharing funny memes, or sending documentation easily.
Methods for Taking Screenshots on iPad
Using Physical Buttons
One of the most straightforward methods to screenshot on iPad involves using the physical buttons on your device:
- Locate the Home button and the Power button (or the Volume Up button for iPads that don’t have a Home button).
- Press and hold both buttons simultaneously.
- You’ll hear a camera shutter sound, confirming the screenshot has been taken.
- Your screenshot will appear in the lower-left corner. Tap on it to edit or share.
Using AssistiveTouch
For users who prefer a more accessible method, AssistiveTouch can help you screenshot on iPad without using hardware buttons:
- Open Settings and navigate to Accessibility.
- Select Touch and then tap on AssistiveTouch.
- Toggle AssistiveTouch on, and a floating menu will appear on your screen.
- Tap on the floating button and select Device > More > Screenshot to capture your screen.
Using the Apple Pencil
If you own an Apple Pencil, it can also be used to take a screenshot on iPad:
- With your Apple Pencil, swipe from the bottom corner of the screen (left or right).
- Just like with the button methods, a screenshot will be taken, and you can edit or share it from the preview.
Editing and Sharing Your Screenshot
Once you’ve captured a screenshot, you can edit it before sharing. Here are some ways to enhance your screenshot experience:
- **Crop** unwanted sections by using the crop tool.
- **Add annotations** such as text or drawings to emphasize important points.
- **Highlight** specific areas using the pen or marker tools.
- **Share** directly through messaging apps or email by tapping the share icon.
Using Complementary Tools with Your Screenshots
To further enhance your screenshots, consider combining them with other tools. Here are some options that work seamlessly with how to screenshot on iPad:
1. Image Editing Apps
Pairing your screenshots with powerful Adobe Photoshop can take your editing to the next level. This software offers extensive features for improving image quality and adding professional touches.
2. Cloud Storage Services
Storing your screenshots on services like Dropbox provides easy access from any device, facilitating efficient sharing.
- **Automatic backup** of your screenshots to avoid loss.
- **Easy sharing** via links you can send to others.
- **Organized folders** to categorize different kinds of images.
- **Cross-device access** enables you to view them on computers or smartphones.
3. Note-Taking Apps
Using an app like Evernote can help you keep all relevant screenshots organized. This might be useful for studying or project planning, allowing you to annotate and collaborate with others.
4. Social Media Platforms
Sharing your screenshots directly to platforms like Instagram can engage your audience. Make sure to use eye-catching graphics or captions to enhance interaction.
5. PDF Converters
Incorporating screenshot files into PDFs with tools such as Adobe Acrobat allows for professional documentation.
6. Collaboration Tools
Utilizing Slack is another excellent option for sharing screenshots within teams, facilitating quick feedback and discussions.
7. Productivity Tools
Apps like Trello can enhance your workflow by integrating screenshots into project boards for visual references during tasks.
8. Graphic Design Software
Expand your creative potential using Canva to design visually appealing graphics or infographics incorporating your screenshots:
- **User-friendly interface** makes design easy even for beginners.
- **Access to templates** helps you create stunning visuals quickly.
- **Collaboration features** allow multiple users to work on designs simultaneously.
- **Direct sharing** capabilities to multiple platforms improve efficiency.
9. Screen Recording Apps
For tutorials or presentations, combining a screenshot with a screen recorder like Camtasia can provide a complete visual guide.
10. File Compression Tools
Using WinZip helps manage multiple screenshots efficiently by compressing them for easier sharing and storage.
Advanced Tips for Screenshots on iPad
To maximize the quality and usefulness of your screenshots, here are some advanced techniques:
- Use **Safari Reader View** to eliminate distractions, capturing just the content you want.
- Annotate with **different colors** for better emphasis while editing.
- Combine multiple screenshots into a **collage** with editing apps for broader context.
- Explore **third-party screenshot tools** such as Snagit for additional features beyond the iPad’s native options.
FAQs About Taking Screenshots on iPad
1. Can I take a screenshot without using buttons?
Yes! Using AssistiveTouch lets you take a screenshot without physical buttons.
2. Where do my screenshots go?
Screenshots are saved in the Photos app under the “Screenshots” album for easy access.
3. Can I change where my screenshots are saved?
iPads do not allow changing the destination folder for screenshots; they will always be saved in the Photos app.
4. Can I record my screen instead of taking a screenshot?
Yes! iPads have a built-in screen recording feature accessible within the Control Center.
Final Thoughts on How to Screenshot on iPad
Learning **how to screenshot on iPad** opens up a world of convenience for capturing and sharing important information. By utilizing various methods and combining this skill with complementary tools, you can enhance your productivity and creativity. Don’t forget to explore different ways to apply your screenshots across platforms, ensuring they serve your needs effectively!
Using AssistiveTouch to Screenshot on iPad
How to Screenshot on iPad: A Complete Guide 📸
Have you ever found something on your iPad that you just want to capture and share? Whether it’s a heartfelt message, an important document, or a stunning image, being able to screenshot on iPad is essential for enhancing your productivity and sharing information effectively. In this comprehensive guide, we’ll explore different methods for taking screenshots on iPad, as well as complementary tools that boost the experience.
Understanding the Basics of Screenshots
Taking screenshots allows you to capture anything displayed on your iPad’s screen. The process is quite straightforward, and you can do it using physical buttons or the AssistiveTouch feature. Let’s delve into the various methods available!
Method 1: Using Physical Buttons
One of the simplest ways to screenshot on iPad is by using the physical buttons on your device. Here’s a step-by-step guide:
- Press the Power button and the Home button simultaneously.
- Release the buttons quickly.
- You should hear a camera shutter sound, and the screenshot will be captured.
- The screenshot thumbnail will appear at the bottom left corner for a few seconds.
Once captured, you can tap the thumbnail to edit or share it immediately. This method stands out for its speed and ease of use. Unlike other devices where screenshotting can involve multiple steps, the iPad simplifies this process significantly.
Method 2: Using AssistiveTouch to Screenshot on iPad
If you prefer not to use physical buttons, enabling the AssistiveTouch feature is an excellent alternative:
- Open the Settings app.
- Go to Accessibility.
- Select Touch and enable AssistiveTouch.
- Customize the top-level menu and add the Screenshot option.
Now, you can take a screenshot by tapping the AssistiveTouch button on your screen and selecting the screenshot option. This feature is particularly useful for users with physical limitations, ensuring that anyone can screenshot on iPad effortlessly.
Method 3: Using Apple Pencil
If you own an Apple Pencil, taking a screenshot becomes even more intuitive:
- Swipe up from the bottom corner of the iPad using your Apple Pencil.
- Your screen will flash, indicating that a screenshot has been taken.
- A thumbnail will appear for immediate editing or sharing.
This method not only captures your screen but also allows you to annotate using the Pencil, enhancing the overall experience. Compared to traditional screenshot methods, this is famously efficient for creatives and note-takers.
How to Edit Your Screenshots on iPad
After taking a screenshot, you can easily edit it. Tapping on the thumbnail that appears gives you access to various tools, such as:
- Drawing tools: Annotate your screenshot with different colors and brushes.
- Text addition: Insert texts to highlight important information.
- Crop and resizing options: Focus on specific areas of the screenshot.
Editing your screenshot on the iPad is quick and intuitive, making it a preferred choice for users who want flexibility in how they share their visuals.
Complementary Tools to Enhance Your Screenshot Experience
Now that you know how to screenshot on iPad, let’s explore some complementary tools that can maximize this functionality:
1. Note-taking Apps
Apps like Evernote can seamlessly integrate with your screenshots, allowing you to save, organize, and annotate them on the go. By using Evernote alongside your iPad’s screenshot feature, you enhance your efficiency in managing visual information.
2. Cloud Storage Solutions
Storing your screenshots on services like Dropbox helps keep them safe and accessible across devices. With the Dropbox app, you gain:
- Easy sharing links for collaborating.
- Automatic backups of important visuals.
- Cross-platform syncing for universal access.
- Enhanced organization with folders and tags.
3. Social Media Platforms
Quickly share your screenshots with friends and followers through platforms like Instagram. Not only can you share moments, but you can also use captioning features to provide context.
4. Image Editor Apps
Applications like Adobe Photoshop Express elevate your editing game beyond basic features. You can refine your screenshots with professional-grade tools, ensuring they look stunning before sharing.
5. Project Management Tools
Incorporate screenshots directly into your work with tools like Trello. Screenshots can help convey ideas clearly in team settings, allowing you to:
- Attach visuals to tasks for better context.
- Discuss updates using annotated screenshots.
- Track progress visually throughout the project.
- Engage team members more effectively through visuals.
6. Collaboration Platforms
Tools like Slack are crucial for teamwork. Including your screenshots in conversations can lead to quicker decisions and clearer communication.
7. File Conversion Tools
Sometimes, you need to convert a screenshot into different formats. Services like Zamzar allow for easy conversion, helping you adapt your visuals for multiple uses.
8. Presentation Software
Utilizing presentation tools like Canva along with your screenshots enables you to craft compelling visual narratives. You can enjoy benefits like:
- Pre-made templates for quick designing.
- Drag-and-drop features for user-friendly editing.
- Easy collaboration options for team-editing.
- High-quality export options for professional presentations.
9. Screen Recording Apps
For more dynamic content, consider using screen recording apps like Camtasia. Combining screenshots with video allows you to present information in a more engaging format.
10. PDF Annotation Apps
Apps like Adobe Acrobat can enhance your experience by allowing you to insert your screenshots into documents for detailed annotations and organization.
Best Practices for Using Screenshots
To maximize your use of the screenshot on iPad feature, consider these best practices:
- Regularly organize your screenshots so you can find them easily.
- Only keep essential screenshots to save storage space.
- Utilize editing tools to focus on important information in your screenshots.
- Consider privacy; avoid capturing sensitive information.
Conclusion: Elevating Your iPad Experience with Screenshots
Understanding how to screenshot on iPad is essential for efficient communication, sharing, and organization of information. By combining this functionality with complementary tools, you can significantly enhance your productivity and creative expression. So, whether you’re capturing memories or important data, tablets like iPads with their intuitive screenshot capabilities make it easier than ever to communicate visually. Embrace these methods, and unlock the full potential of your digital experience!
